
Right, before you can start coding up a storm and getting your bot to interact with users, you first need to make it official. The whole registration process happens right inside Telegram using a special, verified bot called the BotFather. It’s surprisingly quick—less than five minutes, really—and it’s your key to unlocking the Telegram API.
Your First Steps with Telegram’s BotFather
Every bot starts its life not with a line of code, but with a simple conversation. To get started, you need to chat with the BotFather, Telegram’s own bot for creating and managing all other bots. It’s a clever, conversational way to register your project and get the single most important thing you'll need: your API token.
Think of this API token as a super-secure key. It's a unique string of characters that gives your code permission to act on behalf of your bot. It lets you send messages, read what users type, and generally do all the things a bot is meant to do. You need to guard this token carefully—anyone who gets their hands on it can control your bot.
The Registration Commands
Getting this done is as easy as sending a message. Just find the verified BotFather account in Telegram (it’ll have a blue tick next to its name) and start a chat.
- /newbot: This is the first command you’ll send. The BotFather will then ask for a display name and a unique username for your bot.
- Choosing a Name: The display name is what users see. It can be something friendly like "MyMembers Test Bot". The username, on the other hand, must be unique across all of Telegram and absolutely must end in "bot", for example,
MyMembersTestUKBot.
As soon as you give it a username that isn't already taken, the BotFather will congratulate you and hand over your API token. Simple as that.
This whole process taps into the explosive growth of Telegram bots, especially in the UK. By 2023, Telegram's global user base hit around 800 million monthly active users, and Europe accounts for roughly 27% of that. This surge, partly driven by people looking for alternatives to other messaging apps, has made the UK a hotbed for bot development. You can find more stats on Telegram's growth on thunderbit.com.
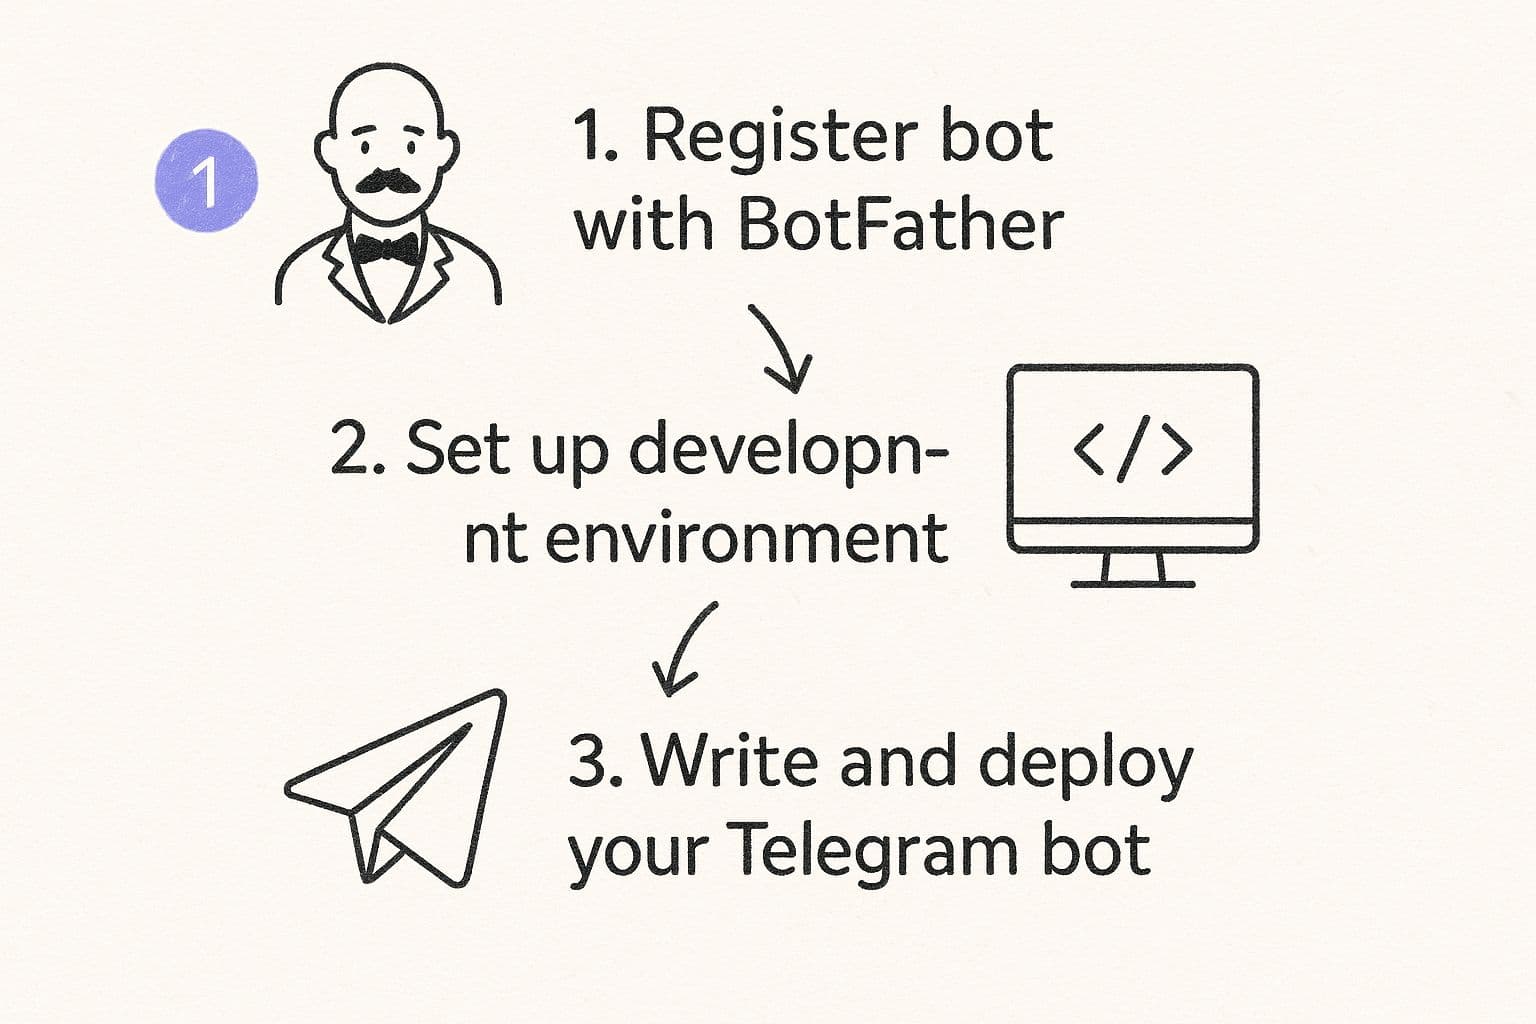
The image below gives you a bird's-eye view of the journey from registration to deployment. It’s a pretty straightforward path.
f4608dc8-cb2e-401d-a894-861c03f2e60a.jpg
As the visual shows, registering the bot is the foundational first step. You can't start developing until this is done.
Interpreting the BotFather's Response
After you send the /newbot command and pick your names, you'll get a confirmation message that looks something like this.
f4608dc8-cb2e-401d-a894-861c03f2e60a.jpg
This screenshot shows the successful creation of a bot and, most importantly, provides that critical API token you'll need for the coding part.
Key Takeaway: The BotFather is more than just a registration desk. It’s your command centre for managing everything about your bot. You can use it to set a profile picture (
/setuserpic), add a description, and even define a list of commands (/setcommands) your bot will respond to.
With your bot officially registered and your API token securely saved, you've knocked out the first, non-technical phase. You now have a real bot entity, ready and waiting for you to bring it to life with some code.
Bringing Your Bot to Life with Python
Alright, you've got your API token from BotFather. Now for the fun part: writing the code that actually makes your bot do things.

7e956315-35f6-4313-ac42-04b74b5172d0.jpg
We're going to use Python. Why? Because its syntax is clean, the community support is massive, and it's perfect if you want to make a Telegram bot without getting lost in a jungle of complicated code.
Our first project is a rite of passage: the "Echo Bot". It’s incredibly simple. A user sends a message, and the bot immediately sends that exact message back. While it sounds basic, it’s the best way to confirm everything is connected and working. It’s a sanity check that proves your script can talk to the Telegram API.
Before you start coding, let's get your workspace sorted. I always recommend creating a new folder just for your bot project. Keeps things tidy.
Inside that folder, the first thing you'll need is the library that does all the heavy lifting for us: python-telegram-bot. It’s a wrapper for the official API that makes sending messages and handling commands a thousand times easier.
You can install it with pip, Python's package manager. Just pop open your terminal and run this:
pip install python-telegram-bot
Your First Bot Script
Go ahead and create a new Python file in your project folder. Call it bot.py or something you’ll remember. This is where your bot's brain will live.
At its core, your script needs two things to function: an Application and at least one Handler.
- The
Applicationis the main engine. It connects to Telegram using your API token and manages everything. Handlersare the listeners. They wait for specific updates from Telegram—like a new message or a command—and then trigger a function you've written.
For our Echo Bot, we’ll use a MessageHandler. This little guy will listen for any text messages sent to the bot and then call our echo function.
My Advice: Don't try to build your masterpiece on day one. Start with an Echo Bot. Seriously. Resisting the urge to add a million features right away lets you confirm your token works, your setup is correct, and you understand the basic request-response loop. It'll save you so many headaches later.
Before we dive into the code, it helps to understand the key bits and pieces you'll be working with. Getting your head around these concepts is crucial before you try to make a Telegram bot with more complex features.
Core Components of a Python Telegram Bot Script
Here's a quick breakdown of the essential code components and what they actually do.
| Component | Purpose | Example Library Function |
|---|---|---|
| Application | The main object that orchestrates the entire bot, connecting to Telegram and managing updates. | Application.builder().token(TOKEN).build() |
| Handler | A listener that triggers a specific function based on user input, like a text message or a command. | MessageHandler(filters.TEXT, echo_function) |
| Filter | Used within a handler to specify what kind of update it should react to (e.g., only text, images, or commands). | filters.TEXT & (~filters.COMMAND) |
| Updater | The part of the application that fetches updates from Telegram and passes them to the handlers. | application.run_polling() |
Once you've got these concepts down, the code itself starts to make a lot more sense.
Coding the Echo Logic
The heart of our Echo Bot is a single Python function. This function will automatically receive two arguments from the handler: update and context.
The update object is a goldmine of information. It contains everything about the incoming message—the text itself, who sent it, the chat ID, and more. The context object is your toolkit for responding. It has methods like context.bot.send_message() that let you perform actions.
So, your function will simply grab the text from the update and use the send_message method to fire it right back to the same chat. Simple as that.
Once you’ve got the hang of building bots, you might start thinking about how to turn your creation into a business. This often means creating private, paid communities. If that sounds interesting, our guide on creating a Telegram membership bot is a great next step.
Finally, you need to kickstart the whole process. At the end of your script, you'll add the command application.run_polling(). This puts your bot into a continuous loop, where it constantly "polls" or asks Telegram, "Any new messages for me?". When one arrives, the application routes it to the right handler, your echo function runs, and voilà—your bot is alive.
Right, an Echo Bot is a decent first step, but let's be honest, it's a bit of a gimmick. The real power comes when your bot starts doing useful things. This is where you graduate from just echoing text and begin to make a Telegram bot that actually helps people. It all comes down to building a set of custom commands.
Think of your bot's commands as its user interface. A couple of commands are non-negotiable for a good user experience: /start and /help. The /start command is almost always the first thing a user types, making it the perfect spot for a warm welcome. And /help? That's your bot’s instruction manual, instantly telling people what it can actually do.
Structuring Your Command Handlers
As you add more commands, your main script can turn into a real mess, fast. I've been there. The secret to keeping things organised is to give each command its own, separate Python function. Then, you just link each function to its command using a CommandHandler.
This approach is a lifesaver. Trust me. When you need to tweak or debug the /help command later, you can jump straight to its dedicated function instead of digging through a mountain of unrelated code.
Let's build out two of the most essential commands:
- The Start Command: This will greet a new user by their first name. We can easily pull their name from the
updateobject Telegram sends, which instantly makes the bot feel more personal. - The Help Command: This command will list out everything the bot can do, with a short, clear description for each function.
By keeping the logic separate like this, adding new features is as simple as creating a new function and plugging in a CommandHandler. This structure is the difference between a bot you can maintain for years and one you'll abandon after a month.
Expert Tip: Before you write a single line of code, map out your commands. Seriously. Think like your user. What will they actually want to do? Good commands are intuitive and solve a real problem, like checking an order status or pulling up specific information. That's what makes a bot genuinely useful.
Adding Richer Content and Formatting
Plain text gets the job done, but it's boring. Telegram is capable of so much more. You can make your bot’s messages pop by using simple formatting or even sending images. The API supports Markdown, which means you can add bold, italic, or monospaced text with just a few extra characters.
For example, that help message we talked about? Let's make the commands stand out.
- /start - Begin your interaction with the bot.
- /help - See this list of commands.
- /status - Check the current system status.
This tiny change makes a massive difference in readability. All you have to do is tell the send_message function to parse the text as Markdown. Simple.
But why stop at text? You can send other media, too. Imagine a weather bot that doesn't just give you the temperature but also sends a current satellite image. Or a news bot that pairs a headline with a striking photo. Sending an image is just as easy as sending text; you just use a different method, like context.bot.send_photo(), and give it the image URL or file.
This ability to blend text, formatting, and media is what separates a basic script from a polished, interactive Telegram bot. It's how you present information effectively and give your users an experience that makes them want to come back.
Deploying Your Bot for 24/7 Operation
b7b531fa-dc16-4292-97d3-44a801d85786.jpg
Right, so your bot has commands and a bit of personality. That's great. But right now, it only lives when your terminal window is open. The second you close your laptop, it’s dead.
For it to be useful, it needs to be online 24/7. This is where deployment comes in — getting your code off your local machine and onto a cloud server that never sleeps.
Sounds complex, I know. But a few platforms make this step surprisingly straightforward, even if you’ve never touched a server in your life. For those of us in the UK, services like PythonAnywhere or Heroku are brilliant starting points. They handle most of the server admin nonsense, so you can just focus on the code.
The idea is simple: instead of your computer running the Python script, a powerful, always-on computer in a data centre runs it for you. This means your bot never misses a message, day or night.
Getting Your Code Cloud-Ready
Before you can yeet your code to a live server, you need to prep your project. A fresh cloud environment has no idea what libraries you've installed on your machine, so you have to give it a shopping list.
This is done with a special file: requirements.txt. Creating it is dead simple. From your project's directory in your terminal, run this command:
pip freeze > requirements.txt
This command scans all the Python packages in your current environment (like python-telegram-bot) and locks their exact versions into that file. When you deploy, the cloud server will read this list and install the exact same dependencies. No more "it worked on my machine" headaches.
Now for the most important bit: your API token. You must never save your secret token directly in your bot.py script. This is a massive security risk, especially if you ever put your code on a public platform like GitHub.
Critical Security Tip: Always use environment variables for secrets like API tokens. Think of it as a sticky note on the server itself, kept far away from your code. Your script then reads the token from the server's environment when it starts, keeping it out of your codebase entirely.
Picking Your Deployment Platform
The number of deployment options can feel overwhelming. Let's cut through the noise and look at two popular choices that are perfect for a Python bot.
- PythonAnywhere: Just as the name suggests, this platform is built for Python. It gives you a browser-based environment, making it ridiculously easy to upload your files, install your requirements, and run your script. Its free tier is usually more than enough for a simple bot.
- Heroku: A more versatile platform that supports loads of languages. Heroku uses a Git-based workflow. You just push your code to Heroku the same way you’d push to GitHub, and it automatically handles the build and deployment process.
On either platform, the process is pretty similar. You'll sign up, create a new "app," and then upload your code and the all-important requirements.txt file.
Next, you'll find the settings dashboard and add your API token as an environment variable. Finally, you'll start the script using a command the platform provides. Once that's running, your bot is officially live on the internet, ready to help users around the clock.
Beyond Basic Commands: Building a Smarter Bot
Right, so you've got the basics down. Your bot replies, it does a few simple tricks. Now what?
This is where you graduate from making a simple toy to building a genuinely useful tool. The next level is all about creating multi-step conversations and pulling in live data from other places on the web. This is how you build a bot that actually does complex, valuable work instead of just spitting back pre-programmed answers.
A multi-step conversation is exactly what it sounds like. Your bot asks a series of questions and actually remembers the answers to guide the user.
Think about a bot for a local PT. It wouldn't just say "book a session." It would ask what kind of session, then what day, and finally what time, confirming everything at the end. This is a game-changer, but it means your code needs to keep track of where the user is in that conversation—what we call managing their "state."
Plugging Your Bot into the Real World with APIs
The other power move is hooking your bot up to third-party APIs. This is how your bot fetches real-time info and becomes a dynamic resource instead of a static one.
Suddenly, your community bot isn't just a welcome message. It could connect to the local council's data feed to give live updates on bin collection days or report road closures.
Here are a few UK-specific ideas to get you thinking:
- A Proper Transport Bot: Hook it up to the Transport for London (TfL) or National Rail Enquiries APIs. Now it can give live train times and service alerts. Way more useful.
- A Hyper-Local Weather Bot: Use an API like OpenWeatherMap to give forecasts for a specific postcode, not just "London."
- A Niche News Bot: Connect to the BBC News API and let users get updates on only the topics they care about, like tech or local politics.
These integrations transform your bot from a gimmick into an essential tool. And when you combine this with membership features, you can even start charging for premium, high-signal information. For more on that, our guide on using Telegram bots for community groups has some solid ideas.
Why Telegram is Gaining Ground in the UK
The UK's digital economy, which makes up about 10% of its GDP, is hungry for automation. Businesses in finance and retail are already using chatbots to get more efficient, and Telegram bots fit right into that trend.
But there’s another, bigger reason: privacy.
Concerns about data surveillance are a real thing, and Telegram's end-to-end encryption is a massive draw for UK users. You can dig into the stats on Telegram's security appeal over at affmaven.com. This trust makes it the perfect platform for services that handle sensitive user chats.
A Real-World Scenario: Picture a UK-based fitness coach. They could build a bot to manage client subscriptions. It could take payments, deliver daily workout routines pulled from an API, and use multi-step chats to log progress. This automates all the boring admin, letting the coach do what they're paid for—coaching.
Got Questions About Making a Telegram Bot?

49fb5e79-e1c5-4b7a-a89c-526e250163d0.jpg
As you start pulling back the curtain on how to make a Telegram bot, it’s completely normal for a few questions to surface. It’s one of those things that seems complex from the outside.
Let's cut through the noise and tackle some of the most common queries I hear, from costs to coding, so you can dive in with confidence.
First up, the big one: how much does this actually cost? The good news is that getting started is completely free. Registering your bot with the BotFather doesn't cost a penny. You can even run it from your own computer for testing without spending anything beyond your electricity bill.
Of course, for a bot to be genuinely useful, it needs to be online 24/7. This is where deploying to a server comes in. But don't let that scare you. Cloud platforms like Heroku or PythonAnywhere have generous free tiers that are more than enough for a bot with light to medium traffic. You’ll only need to think about paid hosting once your bot gets seriously popular and you need more power and reliability.
What Are the Technical and Language Requirements?
Another question I get all the time is about programming languages. You've got a ton of flexibility here. Honestly, you can use pretty much any language that can make standard web requests.
Python is a huge favourite in the community, mostly because of its simplicity and incredible libraries like python-telegram-bot that do a lot of the heavy lifting for you.
But other languages are just as capable:
- JavaScript (Node.js): A brilliant choice for its speed and non-blocking, asynchronous nature.
- PHP: A classic for a reason. It's a web development workhorse with solid support for this kind of thing.
- Go: If you're chasing high performance and efficiency, Go is a fantastic option.
At the end of the day, the best language is the one you’re most comfortable with. The Telegram API is designed to be accessible, no matter what your tech stack looks like.
Expert Insight: Here's a little secret: a bot is basically a web application without a traditional front end. If you've ever built a simple API, you already have the core skills you need. The logic is all about receiving a request (a user's message) and sending back a response. It’s that straightforward.
This simple approach makes the whole project much more manageable. If you're thinking about how to apply this to build and monetise an audience, diving into effective Telegram community management techniques is the perfect next step.
How Can a Bot Handle Payments Securely?
Finally, what about the money? How can a bot handle payments securely, especially here in the UK? Telegram’s built-in Payment API makes this surprisingly seamless. You just connect a payment provider, like Stripe, directly to your bot via the BotFather.
From there, your bot can generate and send invoices directly to users. They can pay with a credit card right inside the Telegram app without ever leaving the chat. It creates a secure, low-friction experience that’s perfect for selling digital products, access to a premium group, or subscriptions.